Adding Funds to Your Wallet
💰 Adding Funds to Your Wallet
Learn how to fund your CaptchaSonic account using cryptocurrency for instant, secure CAPTCHA solving.
⏱️ Time to Complete: 5-10 minutes
💳 Payment Methods: Bitcoin, Ethereum, USDT, Litecoin, and 10+ more cryptocurrencies
📋 What You'll Learn
By the end of this guide, you'll know how to:
- ✅ Access your billing dashboard
- ✅ Choose and deposit funds via cryptocurrency
- ✅ Track transaction status in real-time
- ✅ Troubleshoot common payment issues
🎯 Prerequisites
Before you begin, make sure you have:
- A verified CaptchaSonic account
- Access to a cryptocurrency wallet (e.g., Binance, Trust Wallet, MetaMask)
- Sufficient crypto balance for your desired deposit amount
[!NOTE] Pay-as-you-go pricing: CaptchaSonic operates on a usage-based model. Your credits never expire, and you're only charged for successfully solved CAPTCHAs.
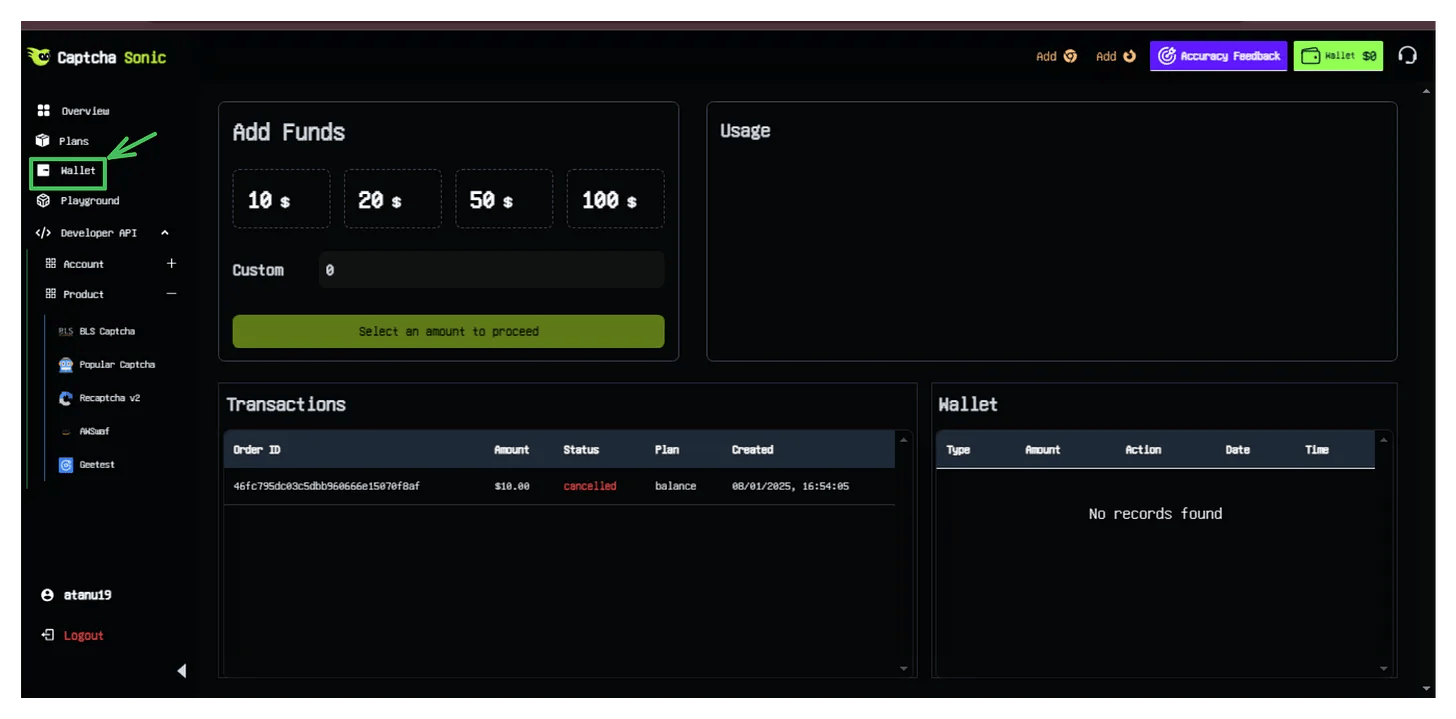
Step 1: Access Your Billing Dashboard
Navigate to your wallet to view your current balance and transaction history.
- Log in to your CaptchaSonic Dashboard
- Click Wallet or Billing in the sidebar menu
- Review your current balance and recent transactions
Dashboard Features:
- 💵 Current Balance - Your available credits
- 📊 Transaction History - All deposits and usage
- 🔄 Recent Orders - Pending and completed payments
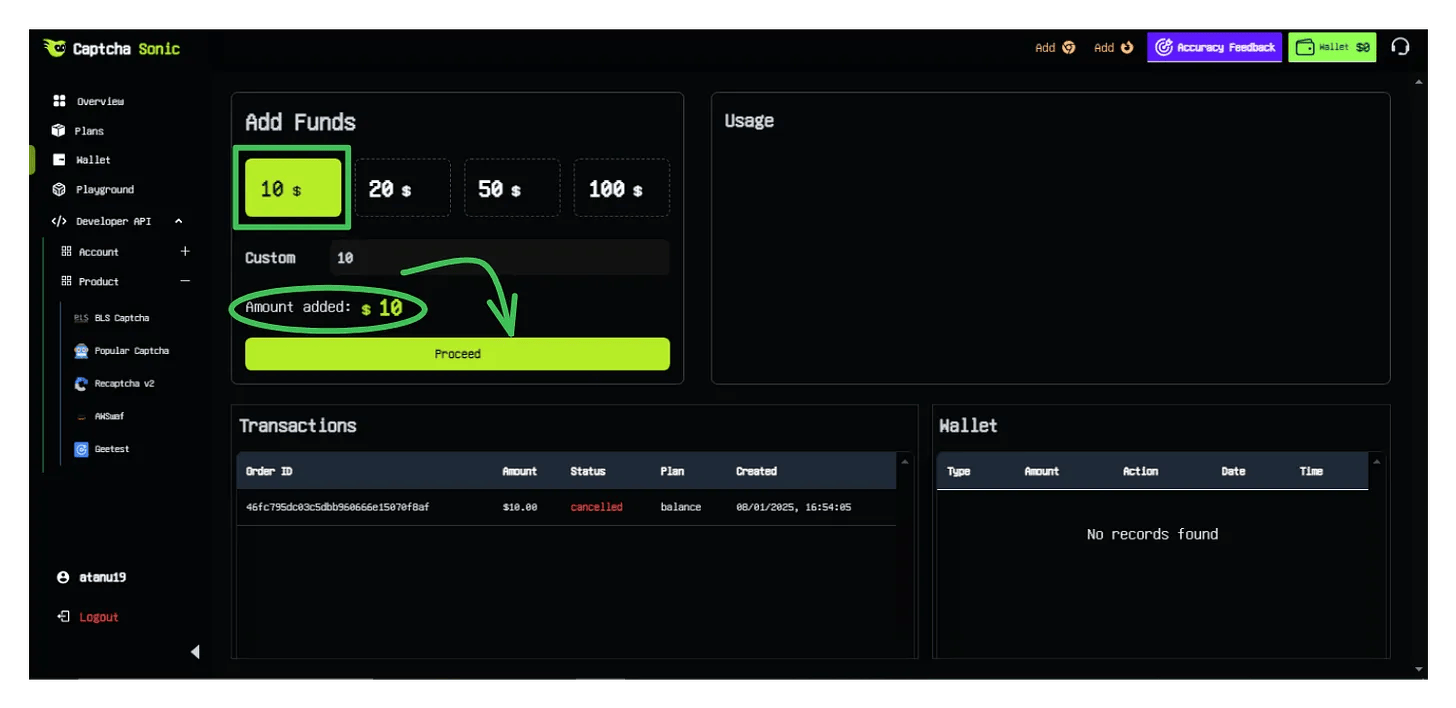
Step 2: Initiate a Deposit
Choose your deposit amount and payment method.
2.1 Select Deposit Amount
Choose from preset amounts or enter a custom value:
- $10 - Good for testing
- $25 - Light usage
- $50 - Regular automation (Recommended)
- $100+ - High-volume operations
[!TIP] Bonus Credits: Higher deposit amounts may qualify for promotional bonus credits. Check your dashboard for active offers.
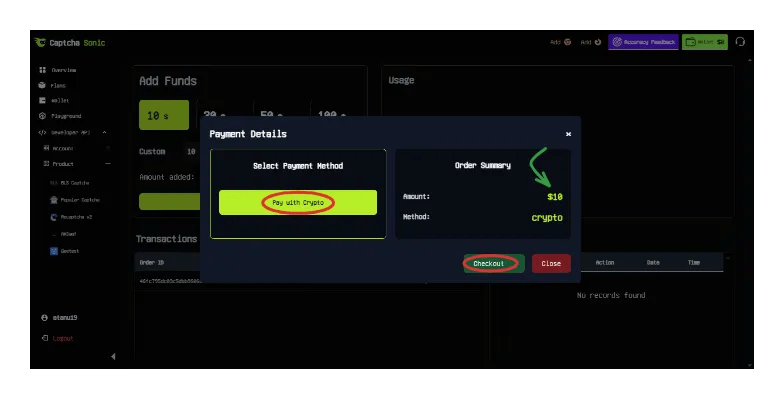
2.2 Choose Cryptocurrency
Click Pay with Crypto and select from 15+ supported cryptocurrencies:
| Cryptocurrency | Networks | Tx Speed | Recommended For |
|---|---|---|---|
| USDT | TRC20, ERC20, BEP20 | ⚡ Fast (2-5 min) | ✅ Best choice |
| Bitcoin | BTC | 🐢 Slow (10-30 min) | Large amounts |
| Ethereum | ERC20 | ⚡ Fast | ETH holders |
| Litecoin | LTC | ⚡ Fast | Alternative |
[!IMPORTANT] Network Selection is Critical: Always verify you're using the correct network. Sending USDT on the wrong network will result in permanent loss of funds.
Step 3: Complete Your Payment
Follow these steps carefully to ensure successful payment.
3.1 Review Order Details
After clicking Checkout, you'll receive:
- 🆔 Order ID - Your unique transaction reference
- 📍 Payment Address - Where to send funds
- 💰 Exact Amount - Precise amount to send
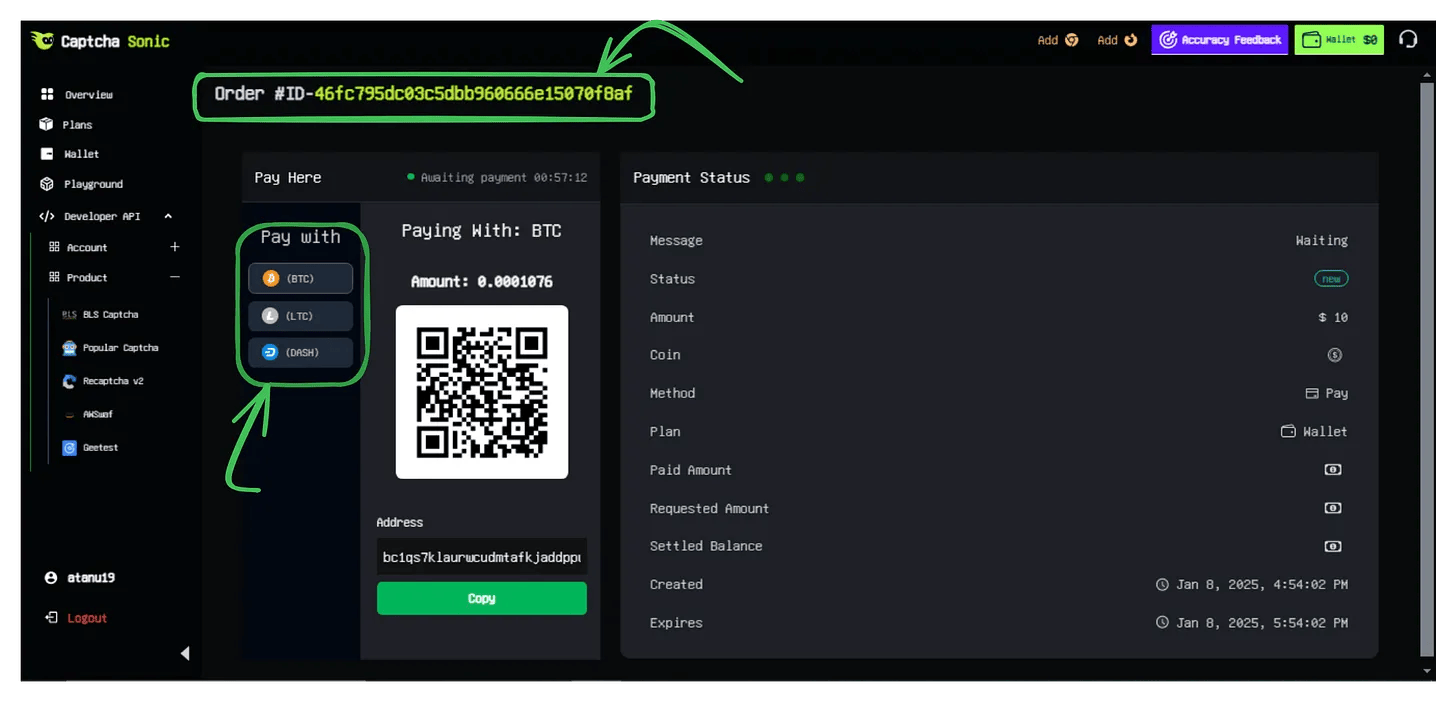
3.2 Send Cryptocurrency
From Your Wallet:
- Copy the payment address (use the Copy button, don't type manually)
- Copy the exact amount required
- Verify the network matches (e.g., TRC20 for USDT on Tron)
- Send the transaction from your wallet
- Save the Transaction Hash (TXID) for reference
Example Transaction:
━━━━━━━━━━━━━━━━━━━━━━━━━━━━━━━━
From:     Your Wallet
To:       TXm8k...7Hn9 (Payment Address)
Amount:   50.00 USDT
Network:  TRC20
Fee:      ~1 TRX (paid separately)
━━━━━━━━━━━━━━━━━━━━━━━━━━━━━━━━
[!WARNING] Double-Check Everything:
- ⚠️ Wrong address = Lost funds
- ⚠️ Wrong network = Lost funds
- ⚠️ Wrong amount = Payment rejected
Always use the "Copy" button instead of manual typing.
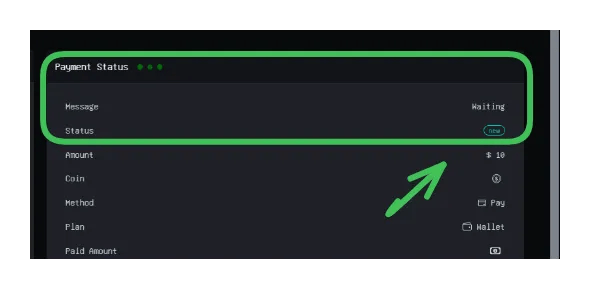
3.3 Monitor Transaction Status
The payment page auto-updates as your transaction progresses:
| Status | Meaning | Typical Wait Time |
|---|---|---|
| ⏳ Waiting | No transaction detected yet | Check your wallet |
| 🔍 Pending | Transaction found, awaiting confirmations | 1-10 minutes |
| ✅ Done | Funds credited to your account | Complete! |
🔒 Security Best Practices
Protect your funds with these essential security tips:
Payment Security
- ✅ Always use HTTPS - Verify the lock icon in your browser
- ✅ Copy, don't type - Use the copy button for addresses
- ✅ Verify the network - Triple-check before sending
- ✅ Start small - Test with $10 first if you're new to crypto
Wallet Safety
- ✅ Include network fees - Ensure your wallet covers withdrawal fees on top of the deposit amount
- ✅ Use "Send Exact Amount" - If available in your wallet settings
- ✅ Keep records - Save your Order ID and Transaction Hash (TXID)
⚡ Transaction Speed Guide
Expected processing times by cryptocurrency:
| Crypto | Network | Detection | Confirmation | Total Time |
|---|---|---|---|---|
| USDT | TRC20 | Instant | 1-2 min | ⚡ 2-5 min |
| USDT | ERC20 | 10-30 sec | 2-5 min | 🔥 3-8 min |
| BTC | Bitcoin | 1-5 min | 10-30 min | 🐢 15-35 min |
| LTC | Litecoin | 30 sec | 2-5 min | ⚡ 3-7 min |
[!TIP] Fastest Option: USDT on TRC20 network offers the best balance of speed, low fees, and reliability.
🛠️ Troubleshooting
Problem: Balance hasn't updated after 1 hour
Solutions:
- Check your transaction on a blockchain explorer
- Verify you sent to the correct address and network
- Contact support with your Order ID and Transaction Hash (TXID)
Problem: "Underpayment" error
Cause: You didn't include enough to cover the exact amount.
Solution:
- Your wallet's withdrawal fee should be ON TOP of the requested amount
- Send a new transaction for the difference, or contact support
Problem: "Wrong Network" error
Cause: You sent USDT on ERC20 but selected TRC20 (or vice versa).
Solution:
- Unfortunately, cross-network transactions cannot be recovered
- Contact support immediately with your TXID to see if recovery is possible
✅ Verification & Next Steps
Once your payment is confirmed:
- ✅ Your dashboard balance updates automatically
- ✅ You receive a confirmation email
- ✅ Funds are immediately available for API use
What's Next?
Now that your account is funded, you can:
- 📖 Integrate CaptchaSonic API into your application
- 🔌 Install the Browser Extension for manual browsing
- 🤖 [Set up Automation](/docs/guides/apiau tomation) with Selenium or Playwright
💬 Need Help?
Support Resources:
- 💬 Live Chat: Available in your Dashboard
- 📧 Email: [email protected]
- 📚 Documentation: docs.captchasonic.com
[!TIP] Enterprise Billing: Need invoicing, NET-30 terms, or recurring billing? Contact our sales team for custom payment arrangements.
🎉 Congratulations! Your CaptchaSonic wallet is now funded and ready to solve CAPTCHAs at scale.